This tutorial is intended to walk you through every tiny step so it may seem tedious at times. Just go with it. Or scroll past the parts you already know and get to the good stuff. I just wanted to be really thorough so next time I start something from scratch I don't have to wonder at all about what I did last time to make it work.
There are a couple of items to note before we jump in. First (and possibly most importantly), all file names are arbitrary. If I say "Create a file called angular-start.js" and you want to call it "friggafrompton.js", that's fine. But later when I reference "angular-start.js", you'll have to remember you named it "friggafrompton.js" and make the appropriate adjustments. Secondly, the reason I'm starting with a blank solution is for future enhancements to this application. If you want to just create a new project, that's fine, but again, you're responsible for remembering you did that later. Next, when you see a word inside brackets, it references a key on the keyboard. So [Enter] means the Enter key on your keyboard. When you see something in quotes and I tell you to type it somewhere, don't type the quotes.
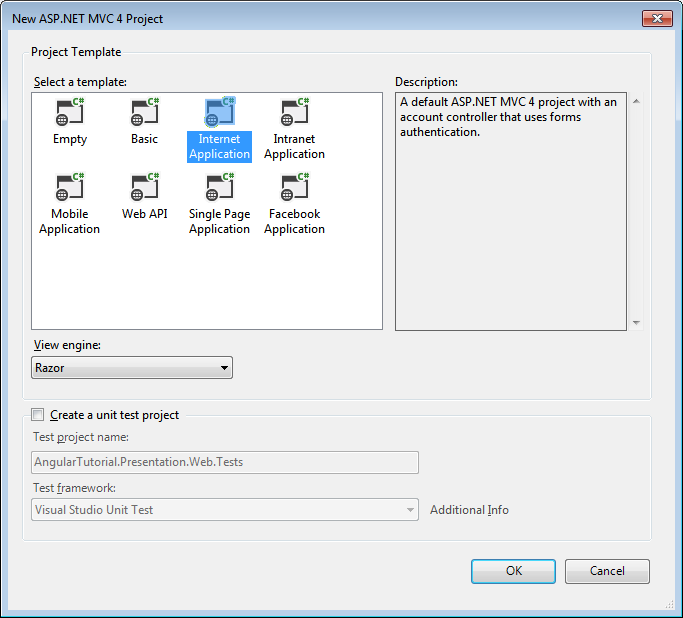
- Open Visual Studio (I use VS 2012)
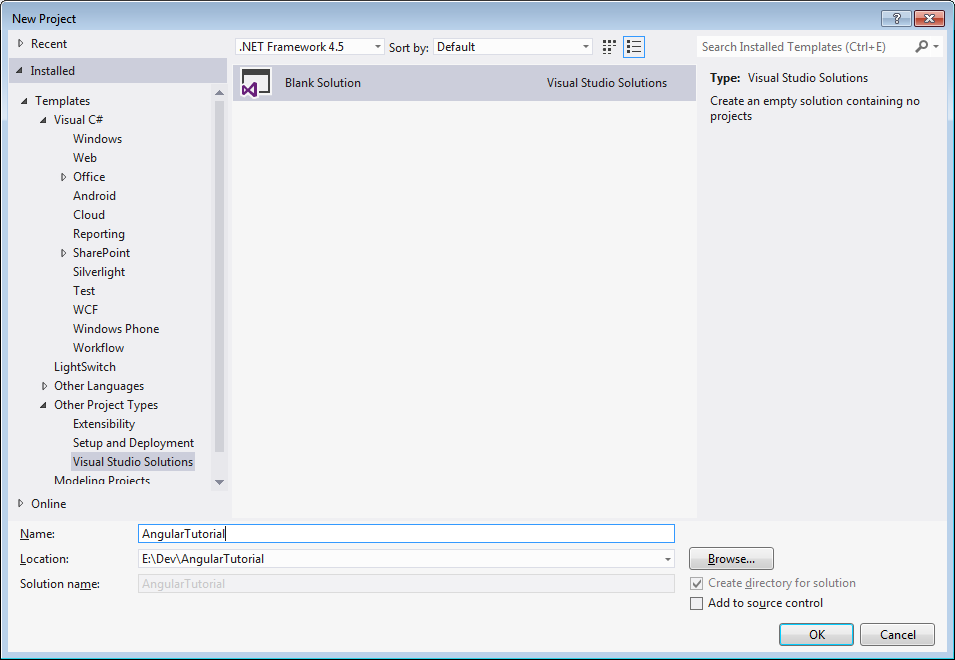
- Create a new Blank Solution named "AngularTutorial"
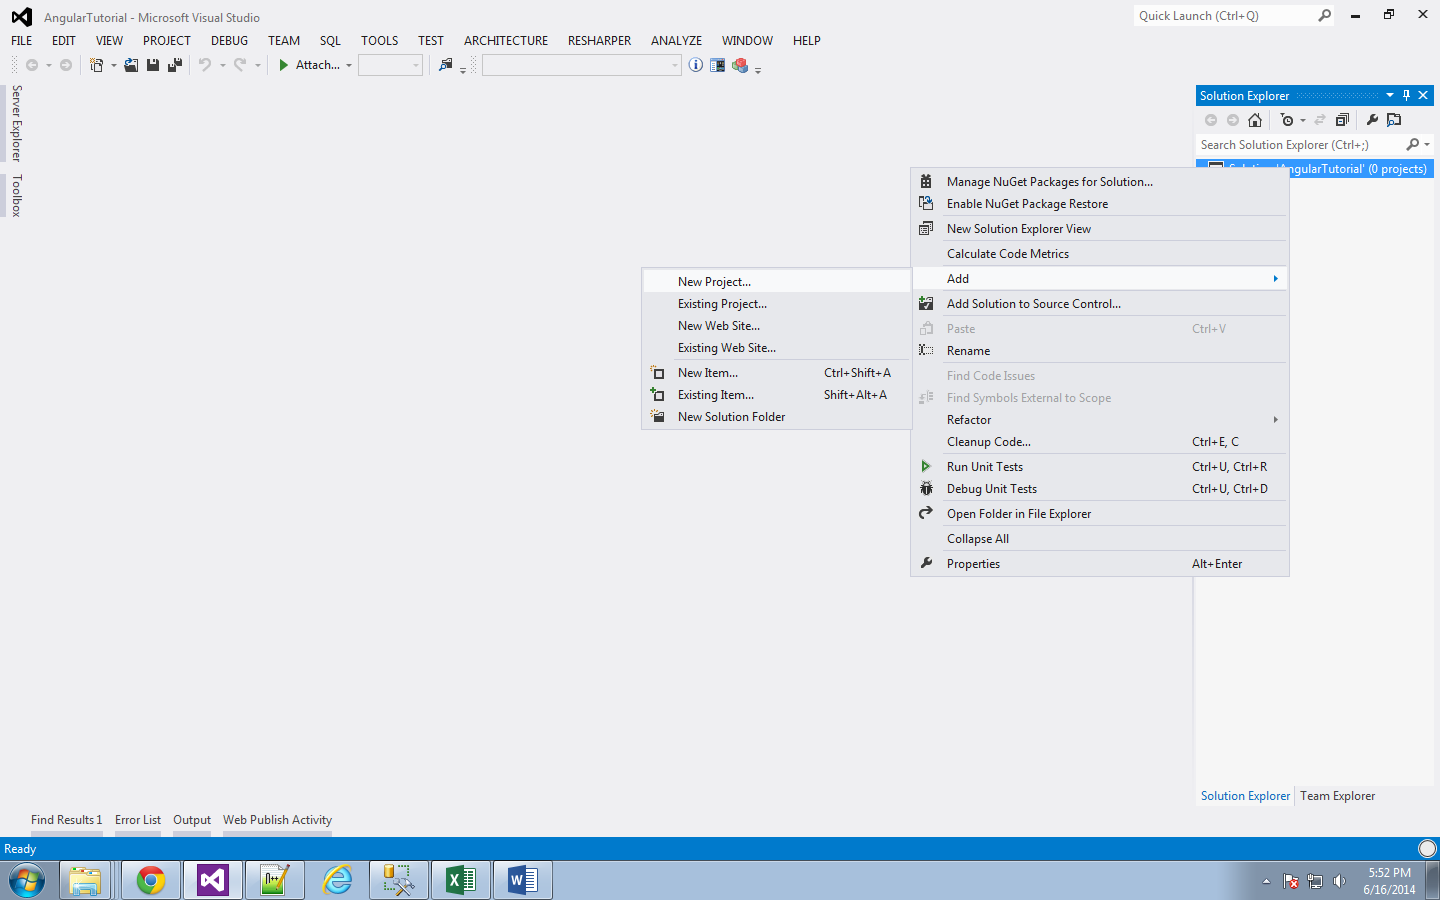
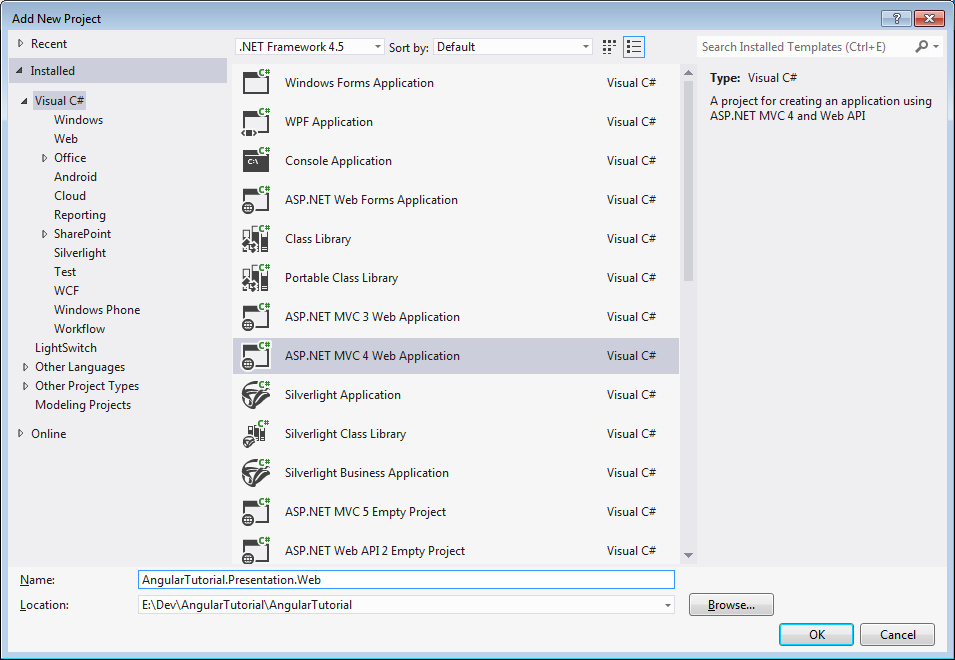
- Add a project named "AngularTutorial.Presentation.Web" to the blank solution
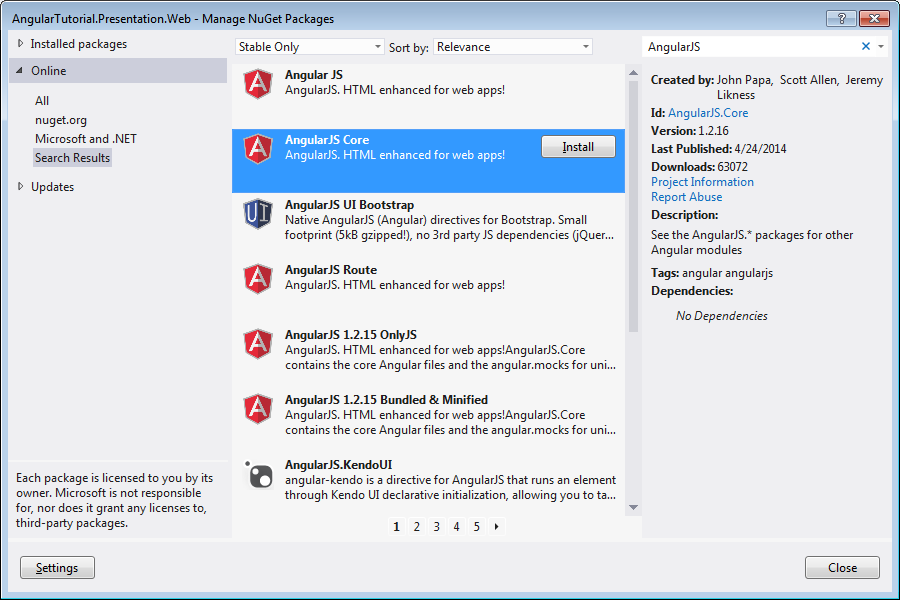
- Expand "AngularTutorial.Presentation.Web" and right-click "References"
- Click "Manage NuGet Packages"
- In the left windowpane, select "nuget.org" or "All"
- In the upper right-hand corner of the window, type "AngularJS" and press [Enter]
- For this tutorial, only install AngularJS Core
- Expand "AngularTutorial.Presentation.Web > Views > Shared"
- Open _Layout.cshtml
- Edit the html tag in _Layout.cshtml to include "ng-app='angularApp'"
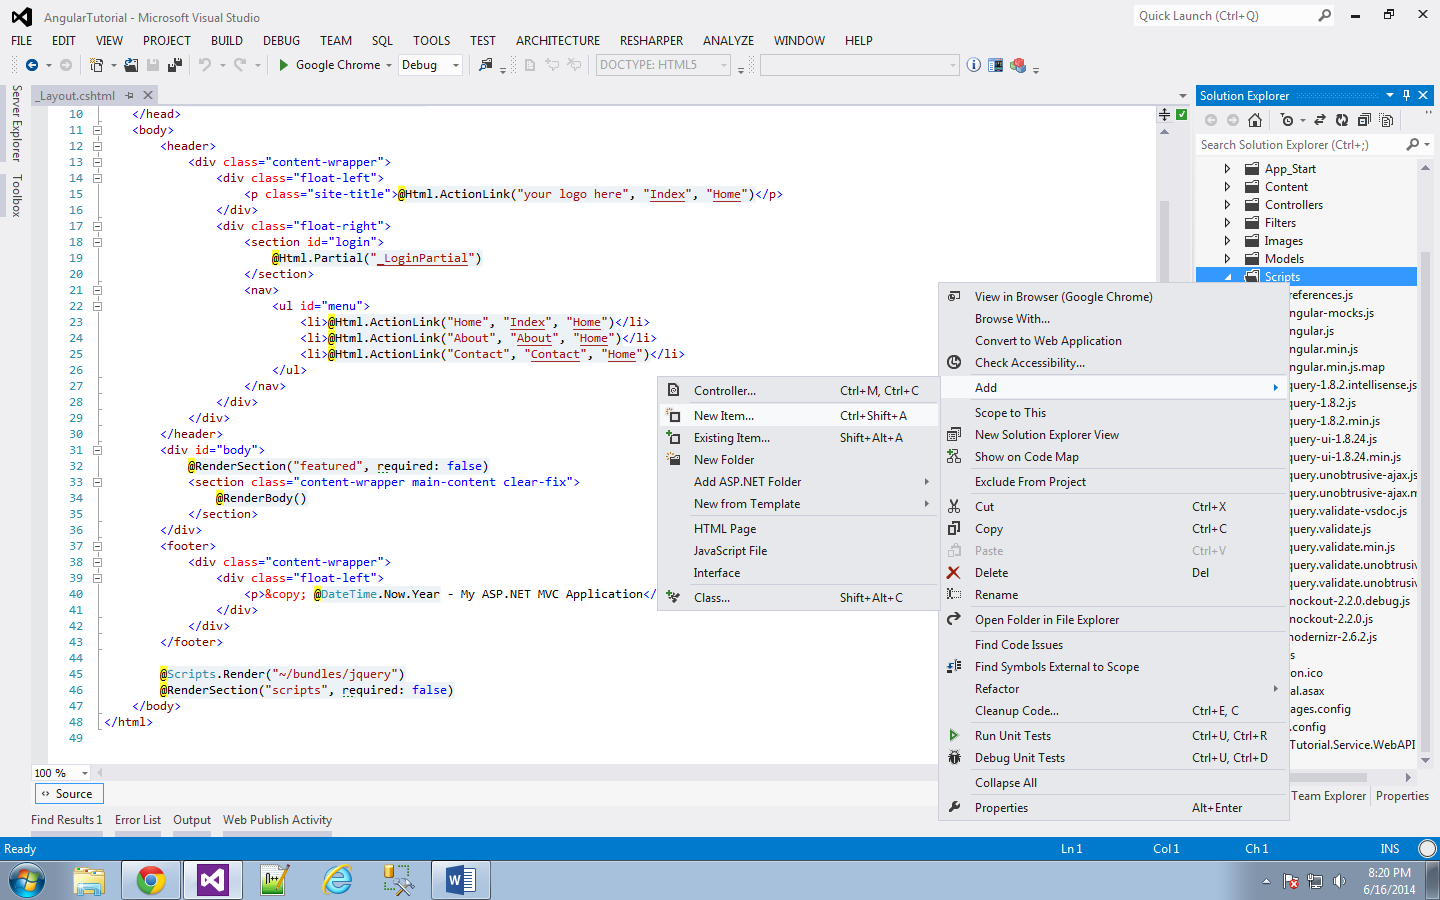
- Expand "AngularTutorial.Presentation.Web"
- Right-click "Scripts"
- Choose "Add > New Item..."
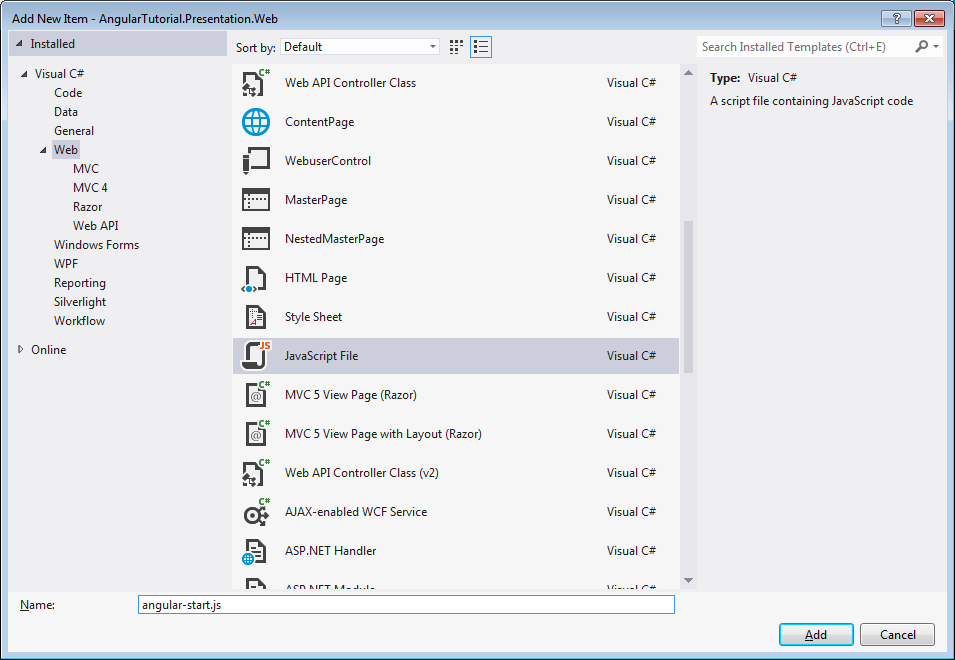
- Scroll down the list of items you can add and click "Javascript File"
- Change the name to "angular-start.js"
- Click the "Add" button
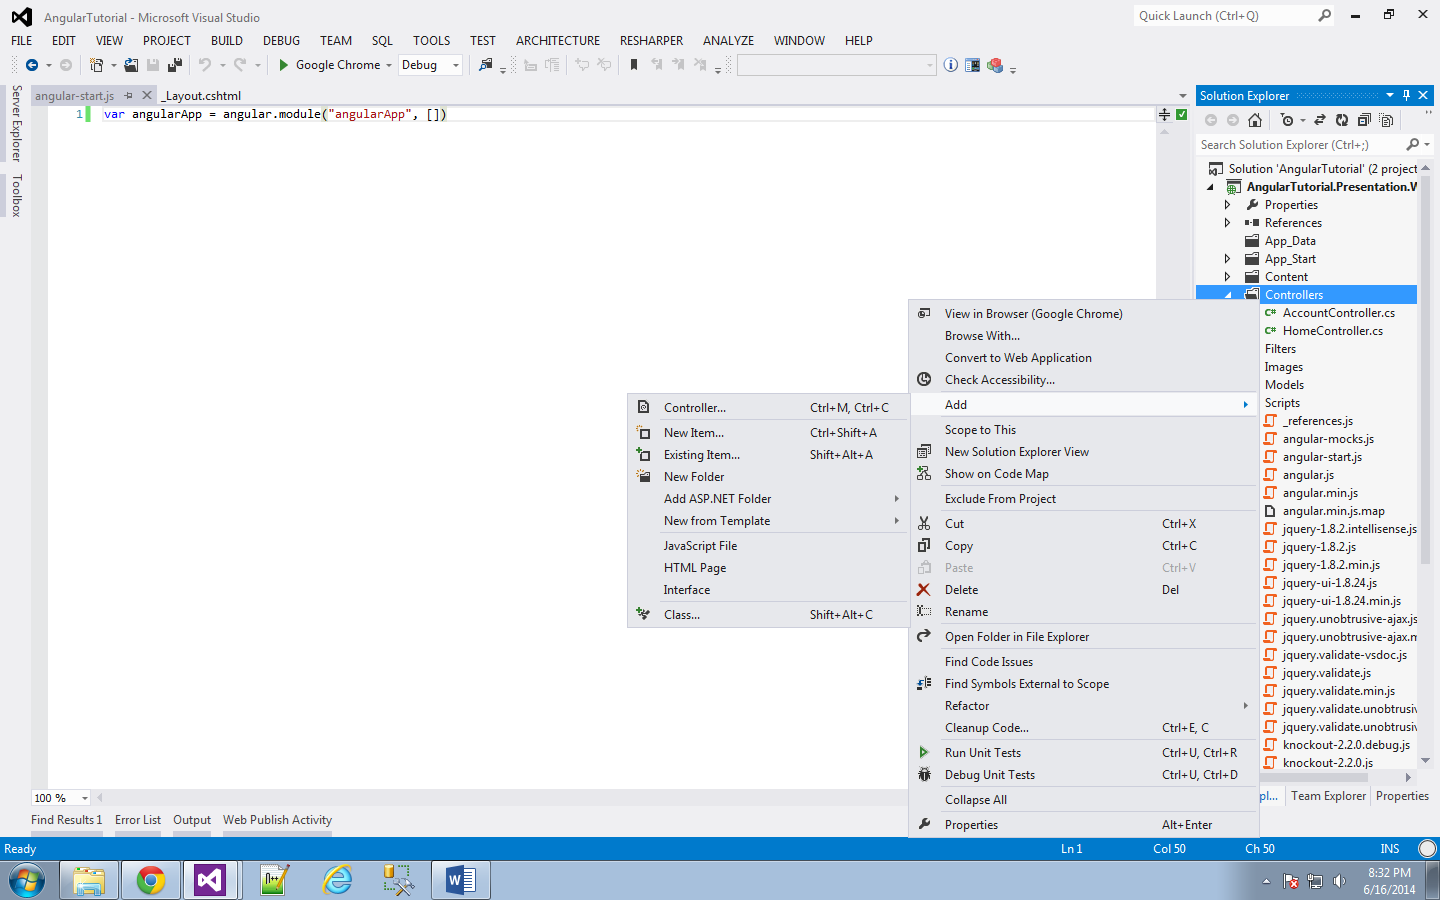
- Add the following line to the top of the blank file ("angular-start.js")
- Expand "AngularTutorial.Presentation.Web"
- Right-click "Controllers"
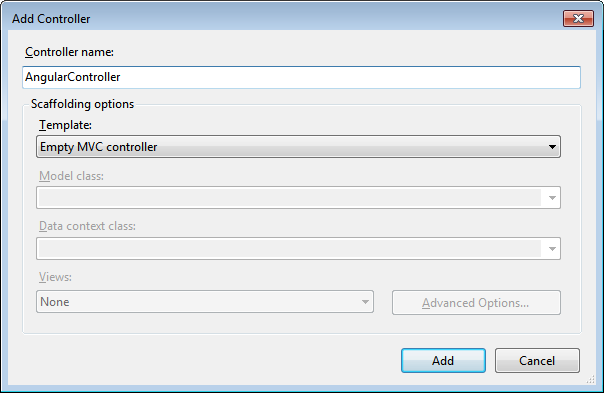
- Choose "Add > Controller..."
- Name the Controller "AngularController"
- Click the "Add" button
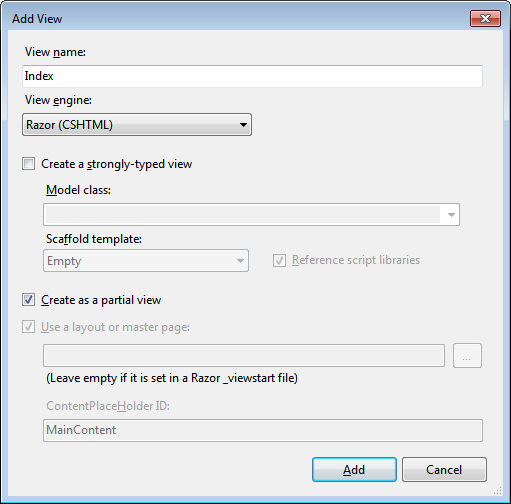
- In the open "AngularController.cs" file, right-click "View()" and choose "Add View..."
- Check the box marked "Create as a partial view"
- Click the "Add" button
- Add the following markup to the top of the blank file ("Index.cshtml")
- Expand "AngularTutorial.Presentation.Web"
- Right-click "Scripts"
- Choose "Add > New Item..."
- Scroll down the list of items you can add and click "Javascript File"
- Change the name to "angularController.js"
- Click the "Add" button
- Add the following line to the top of the blank file ("angularController.js")
- Expand "AngularTutorial.Presentation.Web > App_Start"
- Open "BundleConfig.cs"
- Somewhere in the RegisterBundles method, add the following code
- Go back to "_Layout.cshtml"
- After the jQuery bundle is added, add the new angular bundle
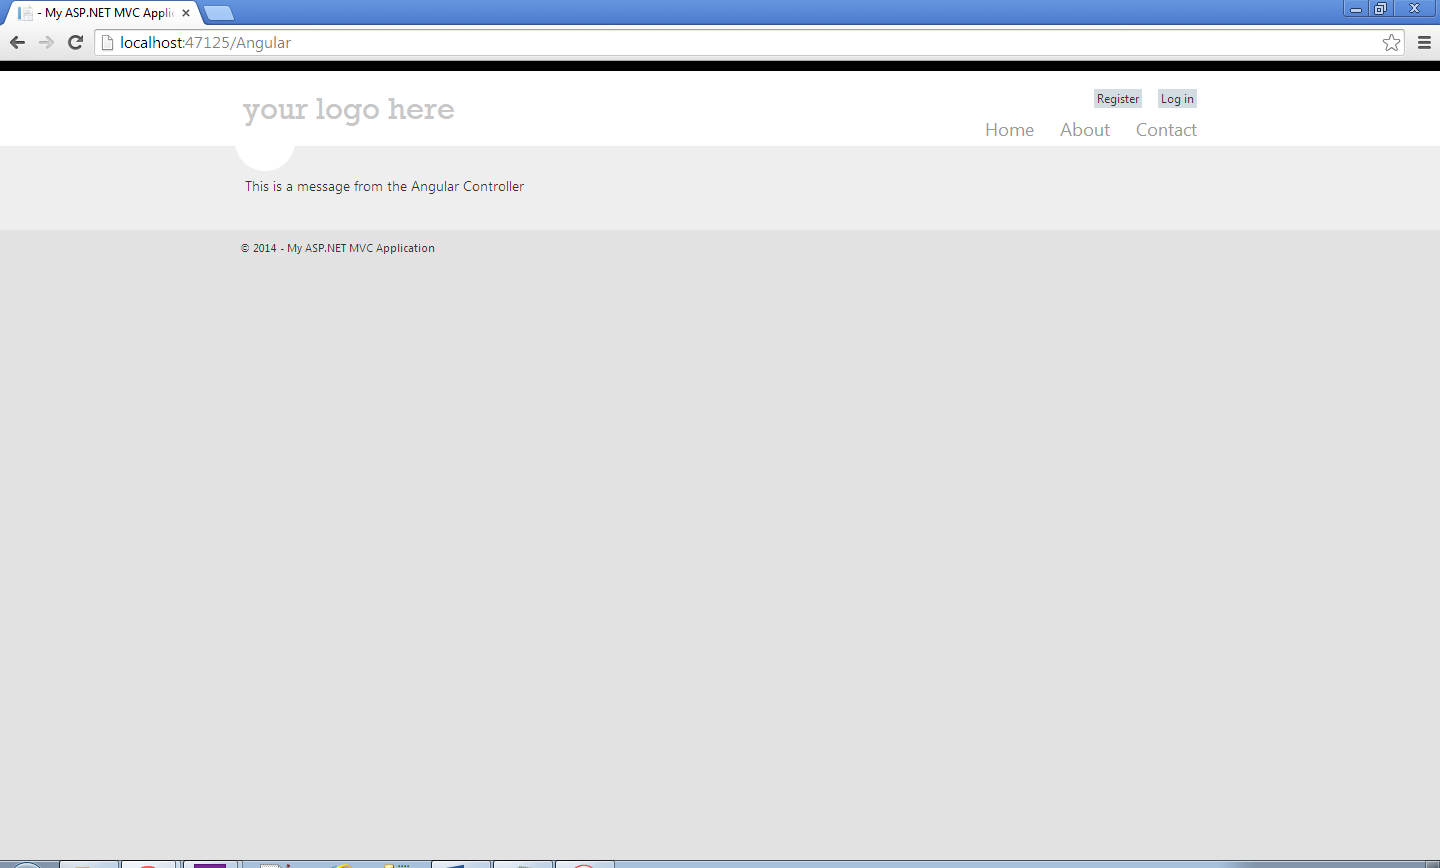
- Build the solution
- Start without debugging
- Navigate to /Angular
- In my case it was http://localhost:47125/Angular
- Witness the fruits of your labor


No comments:
Post a Comment