First things first, if you haven't read the first part of this post, you may want to do that before you continue. Even if you're already familiar with AngularJS and .NET, I created a sample application in that post that I'll be expanding in this post.
One really important note before we jump into this: if you want people to be able to hit each page directly in a SPA, you'll still need to create .NET controllers. For example, we're going to route everyone who hits http://localhost:47125 to Pages/Home.html, but if we don't have a .NET controller for /Home/Index the user will get a 404 error. I don't cover that part in this guide because it's late and I want to go read my book before I go to bed. Don't laugh... seriously, I can still hear you. What, a guy can't read before bed?
- In the last post, we only added AngularJS Core from NuGet. This time we're going to add the full blown Angular suite. Follow steps 4 - 7 in the last post, but when you get to step 8, choose "Angular JS" instead of "AngularJS Core"
- When you do this, you should get a couple of warnings that the file already exists; that's OK, go ahead and replace the current file with the new one
- Open the file you created in step 16 of the last post, "angular-start.js"
- Inside the brackets add "'ngRoute'" (with the single quotes around it, but not the double quotes)
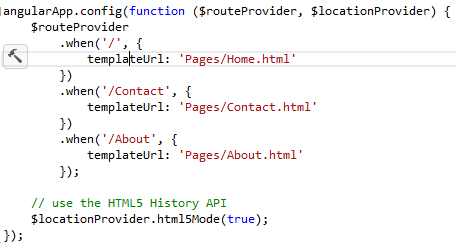
- Beneath that, add what you see below
- There is something very important to note here: I'm not routing to "Views/Home.cshtml" or "Home[Controller]/Index". We're going to create a Pages directory and use that, otherwise (in my experience at least) your .NET routes will interfere with your Angular routes
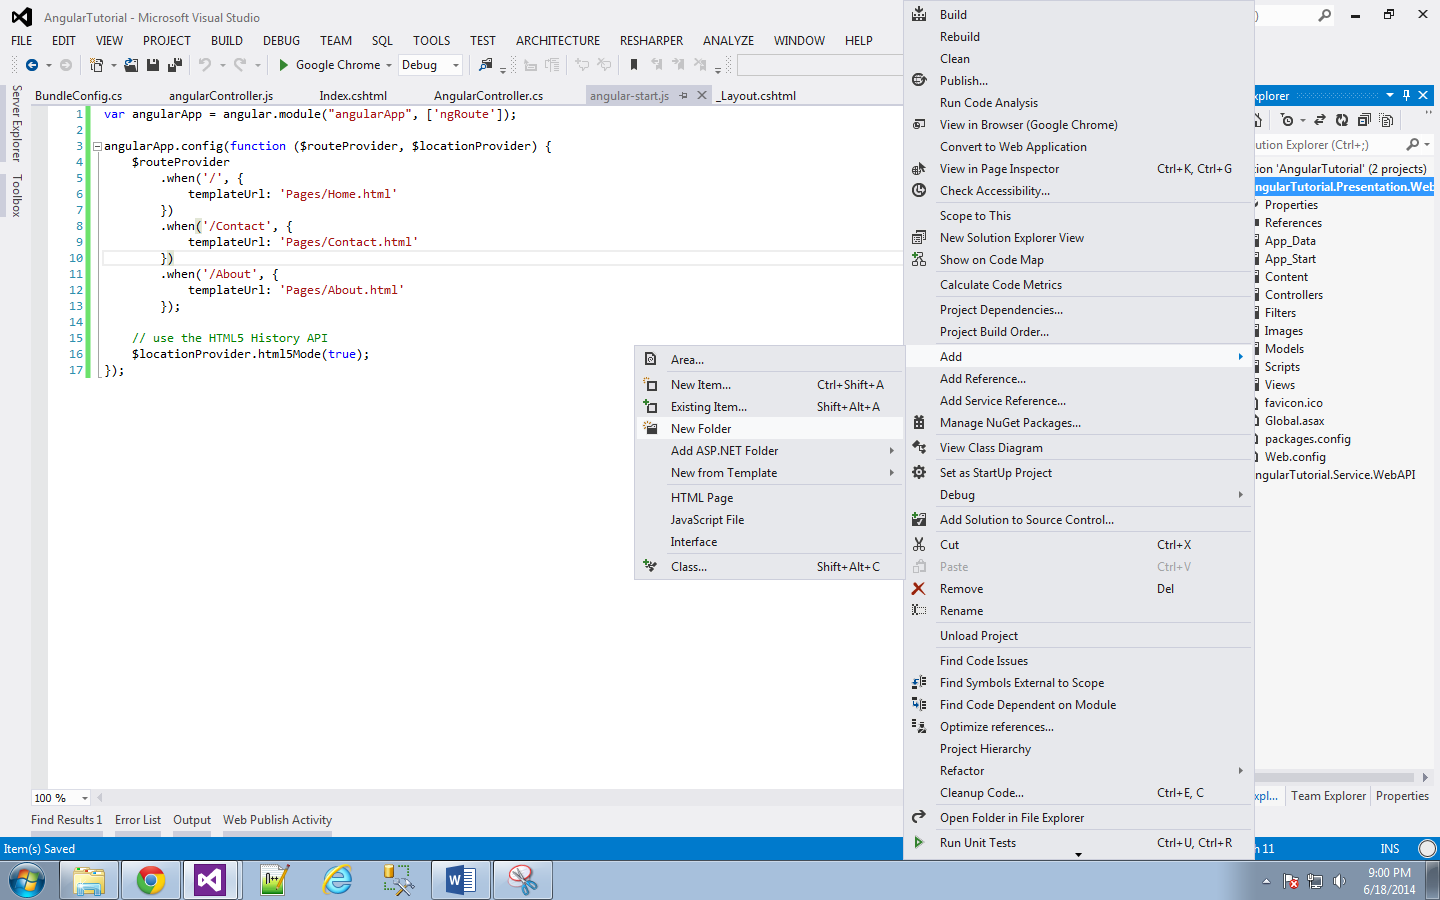
- Right-click "AngularTutorial.Presentation.Web" and choose "Add > New Folder" from the popup menu
- Name the folder "Pages"
- Right-click the new "Pages" folder and choose "Add > New Item..." from the popup menu
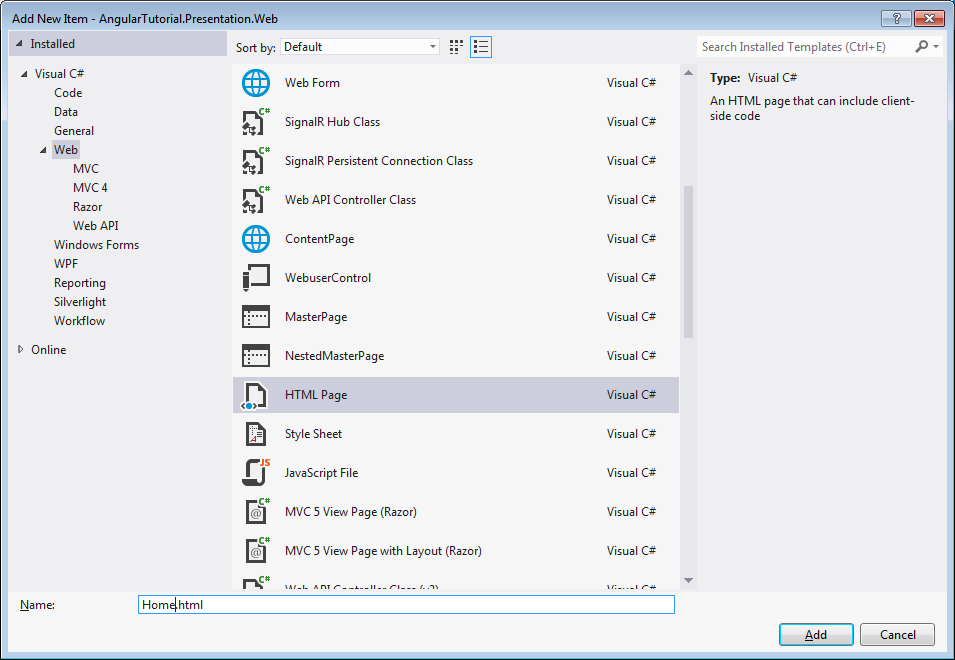
- Scroll down the list of items you can add and click "HTML Page"
- Change the name to "Home.html"
- Click the "Add" button
- Repeat steps 8 - 11 of this tutorial twice, once for "Contact.html" and once for "About.html"
- Follow steps 28 - 33 in the first tutorial three times, creating "contactController.js", "aboutController.js", and "homeController.js"
- Copy/paste the contents of "angularController.js" into each of the three files you created in step 13
- Change the name of the controller in each of the files you created in step 13 to match the name of the file
- For example, change "angularController" to "homeController" in the homeController.js file
- Change the message to something unique for each controller
- Expand "AngularTutorial.Presentation.Web > App_Start"
- Open "BundleConfig.cs"
- In the bundle you created in step 37 of the first post, add the three new controllers you created in step 13 of this post
- In the same bundle, add the "angular-route.js" file that should have been included in your project in step 1
- Expand "AngularTutorial.Presentation.Web > Views > Shared" and open "_Layout.cshtml"
- Replace @RenderBody() with this
- In the same file, locate the ul with id "menu" and remove the 3 default tags
- Insert these tags where you just removed those others
- Notice the path for each of them corresponds to the routes you created in step 4
- Follow steps 40 - 43 of the first post


No comments:
Post a Comment